Fakery

From digital manipulation and digital printing to understanding how to get the most out of your RAW images.
Post Reply
User avatar
Philip
Enthusiast
Enthusiast
Posts: 494
Joined: Tue Mar 25, 2014 2:24 pm
Contact:

Fakery

Post by Philip »

Here is some digital fakery of a pair of old colour slides. They were taken in 1998. That globe is actually attached to the plinth (by a piece of steel I-beam about a foot long) and, were it separate, would weigh 500 lbs (200 kg) or more. It's a WWII anti-submarine-net buoy.

Will, son of some friends, was fourteen then. He's turning thirty this year and is a father himself now.


Image
Fakery di Felip1, su Flickr

I think the slides were Ektachrome 100SW but I can't tell for sure since they are mounted. I think the camera was my Canonet because that's what I used mostly back then. The fakery was in Paint Shop Pro X5.


My Flickrs: http://www.flickr.com/flipflik (recent postings), or
- http://www.flickriver.com/photos/flipfl ... teresting/ (Flickr's calculation of my "most interesting" pics);
- http://www.flickr.com/photos/flipflik/s ... 879115542/ (what I like best).
User avatar
melek
Prolific Poster
Prolific Poster
Posts: 1121
Joined: Mon Mar 24, 2014 7:04 pm
Contact:

Re: Fakery

Post by melek »

So, how did you do this? Just wondering.


-Mike Elek
User avatar
Philip
Enthusiast
Enthusiast
Posts: 494
Joined: Tue Mar 25, 2014 2:24 pm
Contact:

Re: Fakery

Post by Philip »

Mike, it was all done digitally. I wish I could say I did this in the darkroom back in 1998, but it was all done last week in 2014.

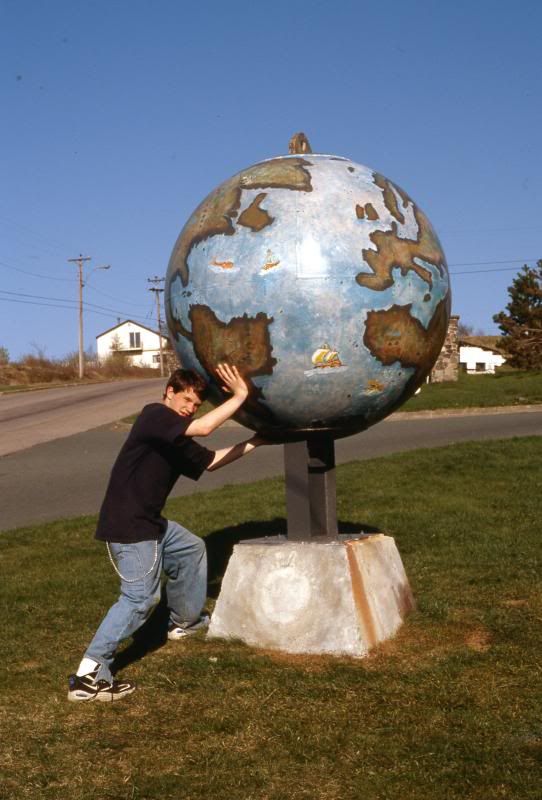
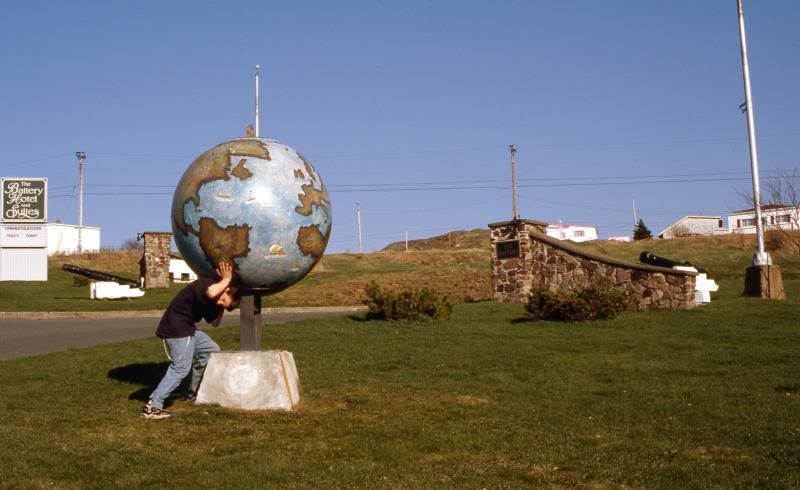
I started with two pictures of Will at the globe. This is what the originals looked like:
Image

and

Image


In one of the faked images (the right side), the globe is where it was in the original picture, but with the I-beam removed. In the other (left) I dropped the globe somewhat.

I had to do some resizing but the most time-consuming thing was "selecting" the globe, pasting it into another image, turning that image a few degrees to get his arm more or less attached to his shoulder again, and then pasting it back to the picture. Then I had to clone in sky around it. If you look closely, the worst artefacts of the process are in the sky where I took less time than I could have. Cloning in the road and grass were quite easy by comparison. All my cloning edges were really sharp, no matter how small a cloning brush I used, so I went over all the stitches with a "softening brush.

You can see, in the originals, an eye at the top of the globe for a hook to lift the buoy into place. I accidentally erased that in the first one, so I then had to take it out of the second one. :)

It's fairly simple-minded but it is tedious. :( It took me about an hour to do the pair of pictures that I posted.

I haven't shown Will yet, but I think he'll be amused.

Philip


My Flickrs: http://www.flickr.com/flipflik (recent postings), or
- http://www.flickriver.com/photos/flipfl ... teresting/ (Flickr's calculation of my "most interesting" pics);
- http://www.flickr.com/photos/flipflik/s ... 879115542/ (what I like best).
Post Reply

Who is online

Users browsing this forum: Google [Bot] and 1 guest